
 kenneth
 Who is this article for?
- Store Managers & Business Owners onboarding their business to EPOS360 who want to quickly digitize printed menus without manual data entry.
- Front-of-House Staff & Operations Leads adding seasonal, daily special, or printed promotional menus on the fly.
About OCR Menu
EPOS360 allows you to instantly digitize a physical menu using optical character recognition (OCR) powered by AI. Instead of manually entering each product name and price, you can scan a printed menu with your device’s camera to automatically extract, structure, and generate high-quality product tiles for your item catalog.
Before you begin
Before scanning your physical menu with OCR, ensure your device and environment meet these requirements:
- Camera Permissions: Ensure EPOS360 has permission to access your device’s camera.
- Lighting & Clarity: Place your printed menu on a flat surface in a well-lit area to maximize extraction accuracy.
- Image Generation: Once OCR extracts your text, EPOS360 can automatically generate AI product images in the background while you continue using the app.
Video Guide
Tablet Guide
1. Navigate to Items Management
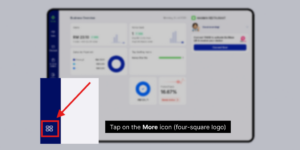
From the EPOS360 home dashboard screen, look at the bottom left navigation bar and tap on the More icon (four-square logo).
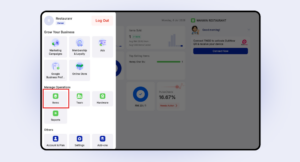
Under the Manage Operations menu options list, locate and tap on Items.
2. Initialize OCR Import
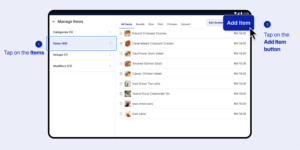
On the Manage Items management screen, tap the blue Add Item button located at the top right part of the screen. A bottom drawer overlay titled Add Items will slide up. Select Create with OCR (Take a photo of your menu, and we’ll extract the item details using AI).
3. Capture the Physical Menu
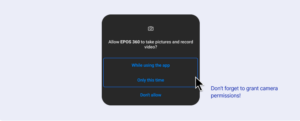
Grant camera permissions if prompted. Position your device directly above your printed menu layout. Ensure the text is clear, legible, and well-lit within the camera view, then tap the round white Shutter/Capture button at the bottom of the screen.
4. Crop and Adjust the Menu Area
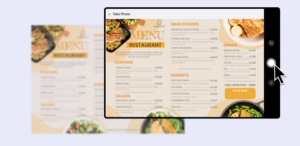
On the Crop Photo adjustments interface, drag the white boundary corner anchors or pinch to adjust frame bounds tightly around the specific column of items and pricing you want to extract (e.g., the COFFEE TO ENJOY section).
Once framed accurately, tap the blue Continue button.
(Wait a few moments while the system displays “Extracting your menu from image…”.)
5. Review and Save Extracted Items
The app will open a Review Item Details summary screen displaying parsed product names and prices (e.g., Cincau – RM 4.80, Lemon Tea – RM 6.50). Verify the details for accuracy, then tap the blue Add to Menu button at the top right of the screen.
6. Generate AI Images for Menu Tiles
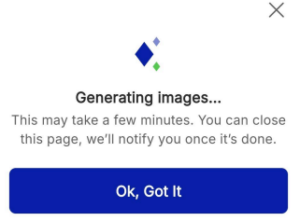
When prompted (“Would you like AI to create the item images for you?”), tap Yes, Generate Images. Tap Ok, Got It on the confirmation window. An “Item added successfully” banner notification will flash at the top of the screen. Your extracted menu items, complete with automatic display image, will populate directly inside your Sell tab product grid ready for checkout processing!
Mobile Guide
1. Navigate to Items Management
- From the EPOS360 home dashboard screen, look at the bottom navigation bar and tap on the More tab icon. Under the More menu options list, locate and tap on Items.
2. Initialize OCR Import
- On the Manage Items management screen, tap the blue Add Item button located at the bottom part of the screen. A bottom drawer overlay titled Add Items will slide up. Select the first option: Create with OCR (Take a photo of your menu, and we’ll extract the item details using AI).
3. Capture the Physical Menu
- Grant camera permissions if prompted. Position your device directly above your printed menu layout. Ensure the text is clear, legible, and well-lit within the camera view, then tap the round white Shutter/Capture button at the bottom of the screen to take the photo.
4. Crop and Adjust the Menu Area
- On the Crop Photo adjustments interface, drag the white boundary corner anchors or pinch to zoom in/out. Align the selection box framework tightly around the specific column of items and pricing you want to extract (e.g., the COFFEE TO ENJOY section).
- Once the target text is accurately framed inside the bounding box, tap the blue Continue button.
- (An animation screen reading “Extracting your menu from image…” will display while the AI system processes the image.)
5. Review and Save Extracted Items
- The app will open a Review Item Details summary screen showing a list of successfully parsed names paired with their respective prices (e.g., Cincau — RM 4.80, Lemon Tea — RM 6.50, etc.). Verify everything looks correct, then tap the blue Add to Menu button at the bottom of the screen.
6. Generate AI Images for Menu Tiles
- When the configuration prompt pops up asking: “Would you like AI to create the item images for you?”, tap Yes, Generate Images. Tap Ok, Got It on the confirmation window indicating “Generating images… This may take a few minutes.” to minimize it.
- An “Item added successfully” banner notification will flash at the top of the screen. Your extracted menu items (complete with automatic, high-quality display images) will now appear inside your Sell tab product grid ready for checkout processing!
Next Article ━━━━━━
Creating groups and modifiers
Continue to the next article to complete your EPOS360 setup.
Read Next →


 Malaysia
 Global
 Singapore