
 kenneth
 Who is this article for?
- Store Managers & Business Owners setting up item customizations, add-on pricing, or required dish options (e.g., sauce choices, side selections).
- Kitchen & Operations Leads organizing order modifiers to ensure clear communication between the POS register and kitchen displays/tickets.
About Group & Modifiers
Groups are sets of modifiers, such as add-ons, spice levels, or flavor choices, that can be attached to your main menu items. Grouping similar options together helps streamline order customization, ensures accurate pricing at checkout, and keeps your POS register organized for staff.
Before you begin
Understanding modifier rules and pricing requirements before setup will ensure a smooth customer checkout flow:
- Quantity Logic (Min/Max Rules): Minimum and maximum limits dictate how staff or customers select modifiers at checkout.
- Optional Modifiers (Min = 0): Setting the Minimum value to 0 makes the group completely optional (e.g., extra sides or toppings).
- Mandatory Modifiers (Min = 1 or higher): Setting the Minimum value to 1 or higher forces a selection before the item can be added to the cart (e.g., choosing a sauce for a chicken chop or a spice level).
- Maximum Cap (Max): Defines the maximum number of modifier options that can be picked simultaneously from the group.
- Mandatory Pricing Entry: Every modifier option requires an explicit price entry. If a modifier is free, you must explicitly enter 0.00 (e.g., RM 0.00).
——————————————————————————————————————————————————
Tablet View
1. Navigate to Group Configurations
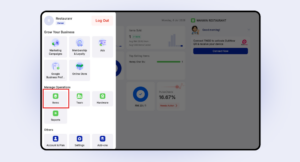
From the main EPOS360 home dashboard, tap the More tab icon at the far right of the bottom navigation bar. Select Items to open the inventory workspace, then switch from the default Item tab to the Group tab at the top of the page.
2. Initialize a New Choice Group
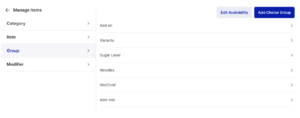
Tap the blue Add Choice Group button. Under the Choice Group Name field, type a clear label for your modifier category (e.g., Add-ons, Sauce Choice, or Spice Level).
3. Configure Quantity Selection Rules
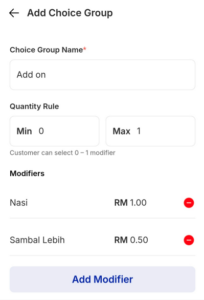
Set your selection rules using the Quantity Rule fields:
- Minimum (Min) Selection: Enter 0 for optional add-ons, or 1 (or higher) to make selection compulsory before checkout.
- Maximum (Max) Selection: Set the upper cap limit on how many total options a customer can select from this group.
4. Populate Modifiers & Pricing
- Enter your individual options alongside their corresponding retail price markups
Note: Every modifier must have a price assigned. Enter 0.00 for free options.- Option 1: In the first Modifiers text field, enter your first option title (e.g., Nasi), then enter its cost in the currency field (e.g., type 1.00 for RM 1.00).
- Option 2: On the next line, enter your second option title (e.g., Sambal Lebih), then assign its cost (e.g., type 0.50 for RM 0.50).
- Continue adding rows for any additional options needed.
5. Save and Process the Group
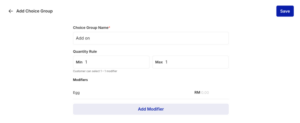
Review your option names, quantity rules, and price entries. Tap the large blue Save action button at the top right of the screen.
A green “Choice group created successfully” toast notification banner will flash at the top of your screen, confirming your modifier group is ready to link to menu items.
——————————————————————————————————————————————————
Mobile View
1. Navigate to Group Configuration
- From the main EPOS360 home dashboard, tap the More tab icon at the far right of the bottom navigation bar. Select Items to open the main inventory control layout, theneswitch from the default Item tab to the Group tab at the top of the Manage Items page.
2. Initialize a New Choice Group
- On the Group configuration screen, tap the blue Add Choice Group button. Under the Choice Group Name text field, type a descriptive label for the category modifier (e.g., Add-on, Sauce Choice, or Spice Level).
3. Configure Quantity Selection Rules
- Determine how customers can interact with this modifier set using the Quantity Rule logic fields:
- Minimum (Min) Value Selection:
- Setting it to 0: Choices are completely optional. Ideal for add-ons that customers can freely opt in or out of (e.g., extra sides).
- Setting it to 1 or higher: Choices are compulsory. Ideal for required selections like core preparation methods, choosing sauces for a chicken chop, or selecting a flavor type.
- Maximum (Max) Value Selection: Defines the maximum cap limit on how many options can be simultaneously picked from the same group during checkout.
4. Populate Modifiers & Pricing
- Input individual item options along with their additional retail markups.
⚠️ CRITICAL REQUIREMENT: Prices must be explicitly filled out for all created modifiers, even if an option is free (enter 0.00 for RM 0.00) - Option 1: In the first Modifiers text input box, enter the title of your first add-on item (e.g., Nasi). Tab over to the currency field and assign its cost value (e.g., type 1.00 to set it to RM 1.00).
- Option 2: In the next line row box, input the title for your second option (e.g., Sambal Lebih). Assign its cost markup value (e.g., type 0.50 to set it to RM 0.50).
5. Save and Process the Group
- Review all option names and pricing entries to ensure structural database accuracy, then tap the large blue Save action button at the top right of the interface.
- A green “Choice group created successfully” pop-up toast notification will flash at the top of your screen. The interface will immediately refresh to your Group category library page, where your new choice group is ready to be mapped to your menu items.
Next Article ━━━━━━
Master Different Selling Methods
Continue to the next article to complete your EPOS360 setup.
Read Next →

 Malaysia
 Global
 Singapore