Add a Wi-Fi or LAN printer

Updated: 1 Sep 2026

A network printer needs its own address on your shop network before EPOS360 can find it. Set that from a Windows PC, then add the printer by IP.

4 steps About 15 minutes Needs a Windows PC Updated 18 Aug 2026

WHO THIS IS FOR

Whoever handles your network

  • — this step needs a PC and a free IP address.

Shops with several tills

  • sharing one printer, or a kitchen printer too far for Bluetooth.

BEFORE YOU BEGIN

Same network, both devices. The printer and your EPOS360 device must sit on the same Wi-Fi or LAN.

A Windows PC and a USB cable to run the Xprinter tool while you set the address.

THE STEPS

The printer keeps whatever address you give it, so pick one nothing else is using.

A network printer must sit on the same network as your EPOS360 device, and it needs an IP address that nothing else is using. This part is done from a Windows PC before you touch the app.
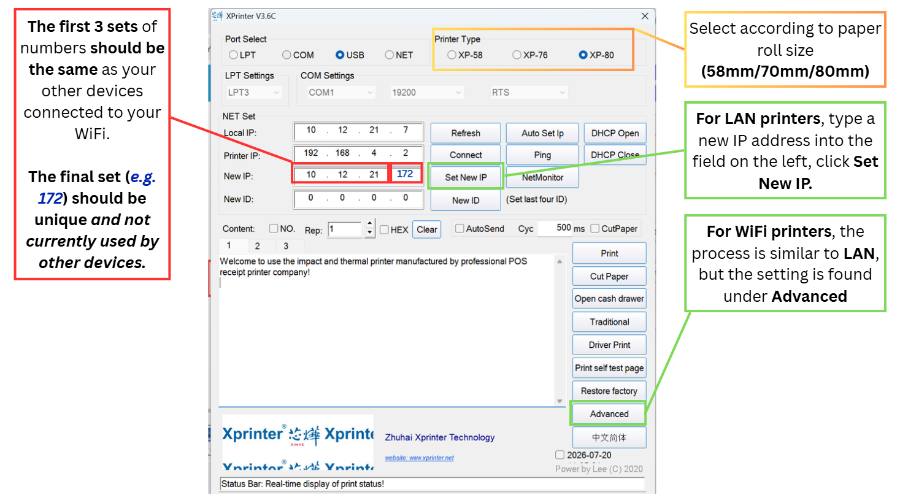
1 Install the Xprinter receipt printer tool on a Windows PC and connect the printer by USB cable. Set Port Select to USB and pick the Printer Type that matches your paper width.
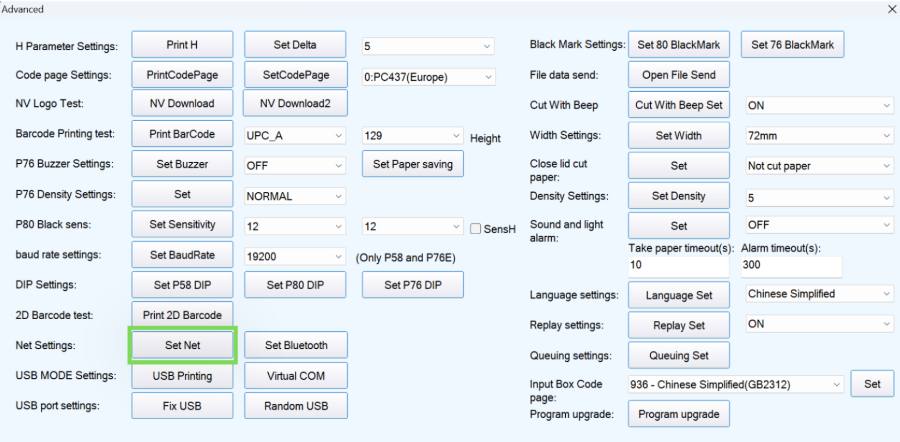
2 LAN printers take the IP on the main screen. For Wi-Fi, go to Advanced › Net Settings: Set Net, enter the IP address and press SetIPAddr. Gateway and netmask normally stay at their defaults; for Wi-Fi also set the SSID (case sensitive) and password.
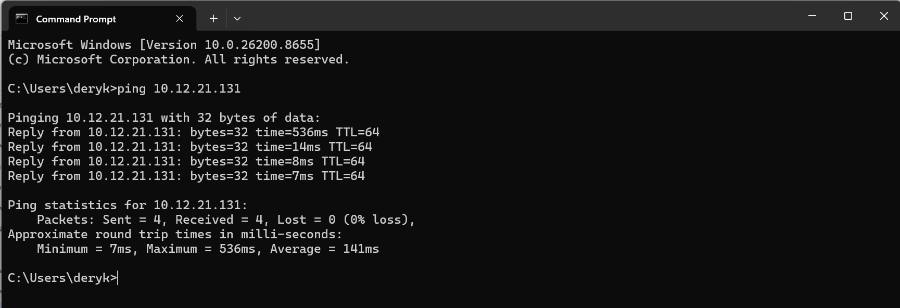
3 Find a free address. Check the IPv4 address of a phone or laptop on the same Wi-Fi — the first three groups must match. Then in Command Prompt run ping on the address you want to use, starting from a higher last number. A reply means it is taken; Destination host unreachable means it is free.
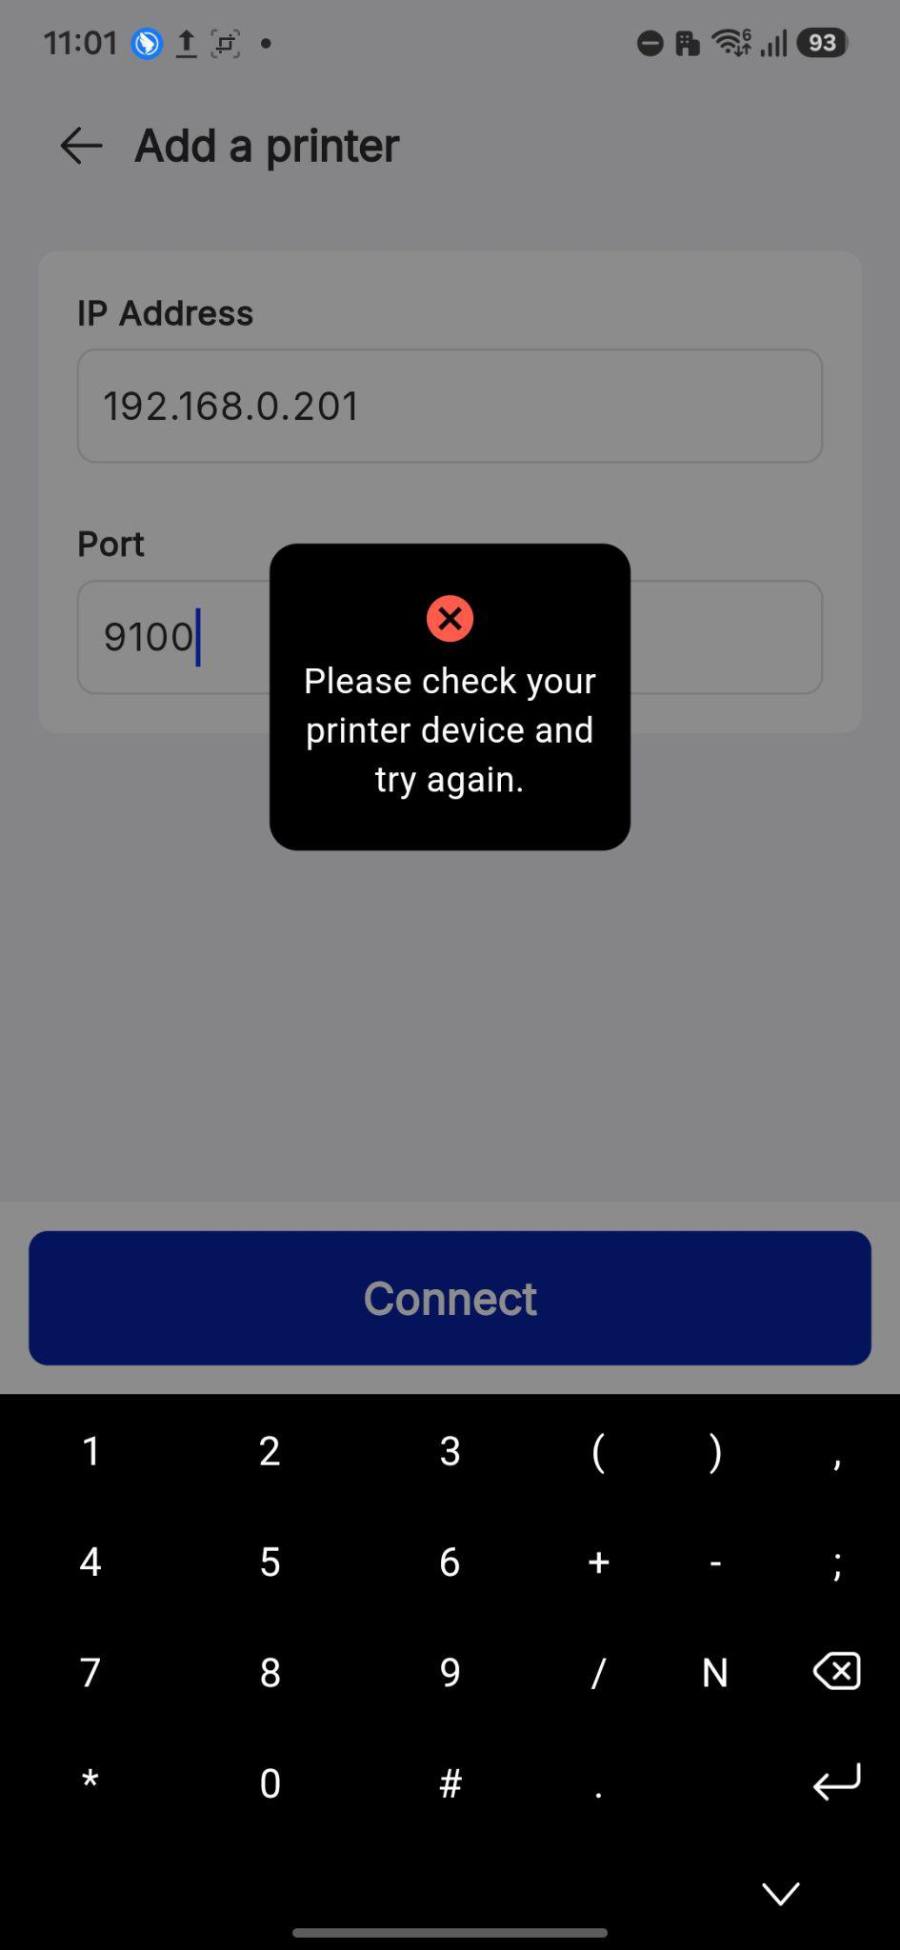
4 In EPOS360 go to Hardware › Add Printer › Wi-Fi, key in that IP address and port 9100. If it cannot find the printer you get an error; if it can, it moves on to the same name, paper width and role setup as above.
The Xprinter tool.
The Xprinter tool.
Advanced, for Wi-Fi settings.
Ping to find a free address.
Key in the IP and port 9100.

Is the network printer connected?

Need help? Contact support

WHERE TO GO NEXT

NEXT

Build your store

Read the guide →
NEXT

Ads & campaigns

Read the guide →

IF IT LOOKS WRONG

The IP must be free and on the same network, and the port must be 9100. Ping the address again to confirm nothing else answers.

The router may have handed that address to another device. Use an address outside the range your router assigns automatically.

SSID and password are case sensitive in the Xprinter tool. Retype both, then set the IP again.

Still need help?

On-site set up and 1:1 training

Get a dedicated trainer to set up and address your needs on the spot.

View plans

Attend free online webinar

Pre-recorded set up demo that you can watch anytime at your own pace.

Sign up