Connect a cash drawer

Updated: 1 Sep 2026

Connect the drawer through your receipt printer, or straight into the POS if it has a built-in printer. Cable it up, pick the matching method in EPOS360, and it kicks open on every cash sale.
1 step About 3 minutes Printer or Hardware Port Updated 18 Aug 2026
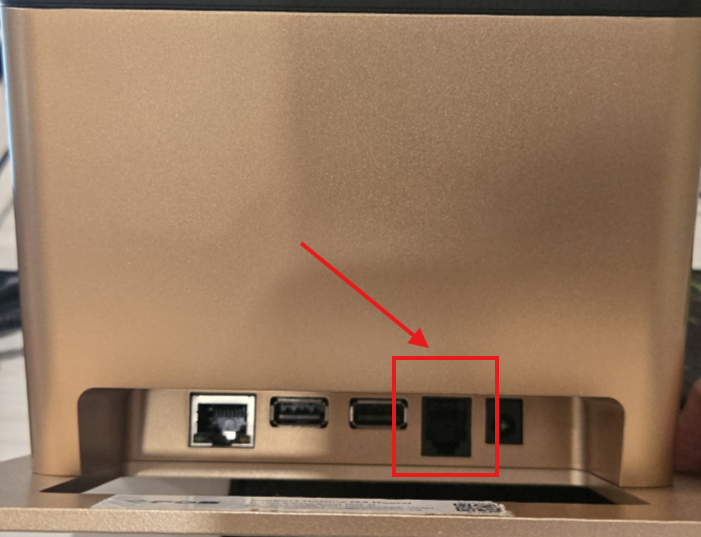
One cable, two possible homes. The RJ11/RJ12 cable goes into the DK port on an external receipt printer, or straight into the port on the back of the POS.

WHO THIS IS FOR

Whoever sets up the counter

  • — whether you run an external printer or a POS with one built in.

Cash-heavy counters

  • that need the drawer to open by itself at the end of a sale.

BEFORE YOU BEGIN

Pair the receipt printer first — if you are using one. The Printer method needs that printer to exist in Hardware already. The Hardware Port method does not.

Know where the cable goes. Into the DK port on an external printer, or into the RJ11/RJ12 port on the POS if your POS has a built-in printer.

THE STEPS

Step 1: Link the cash drawer

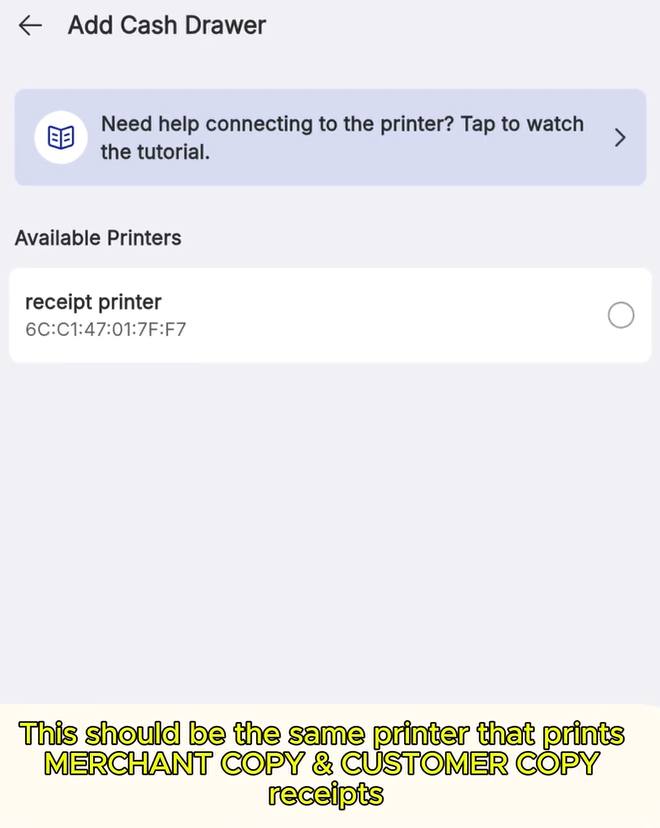
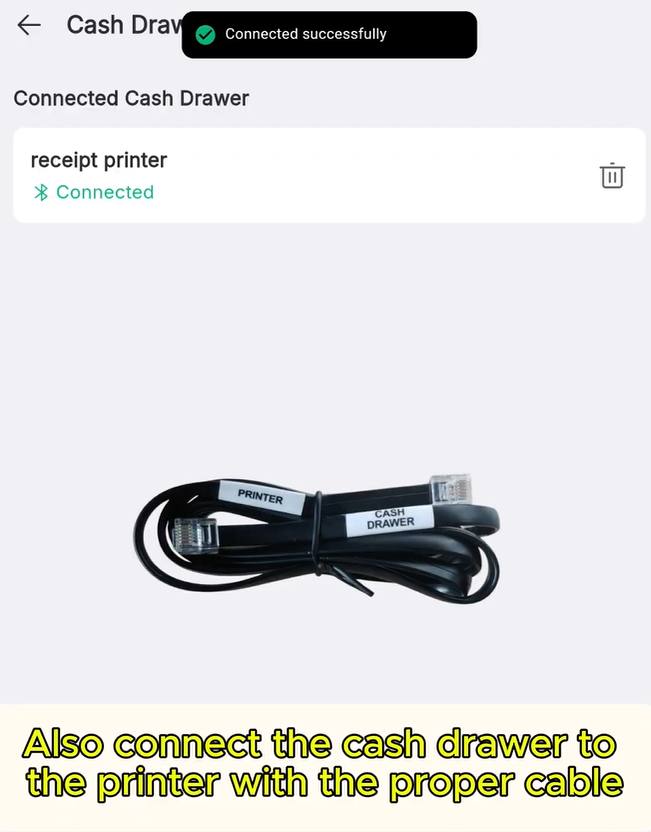
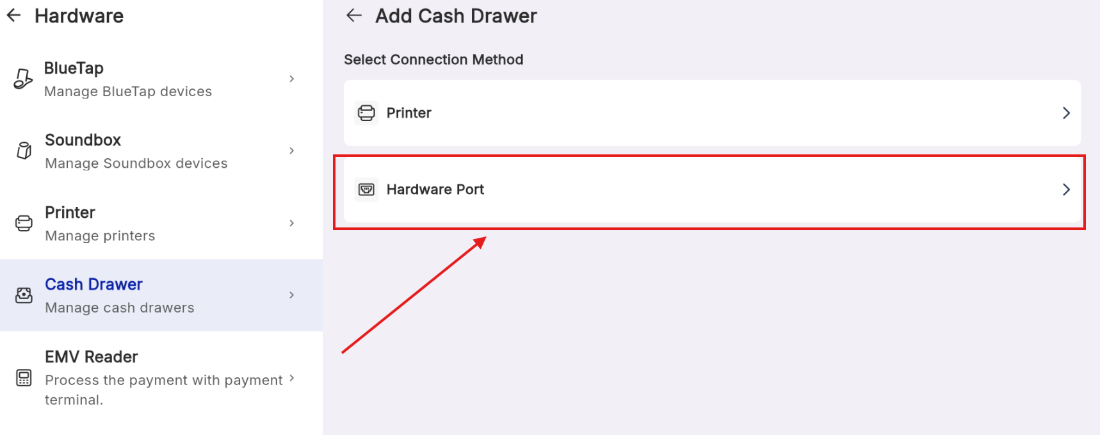
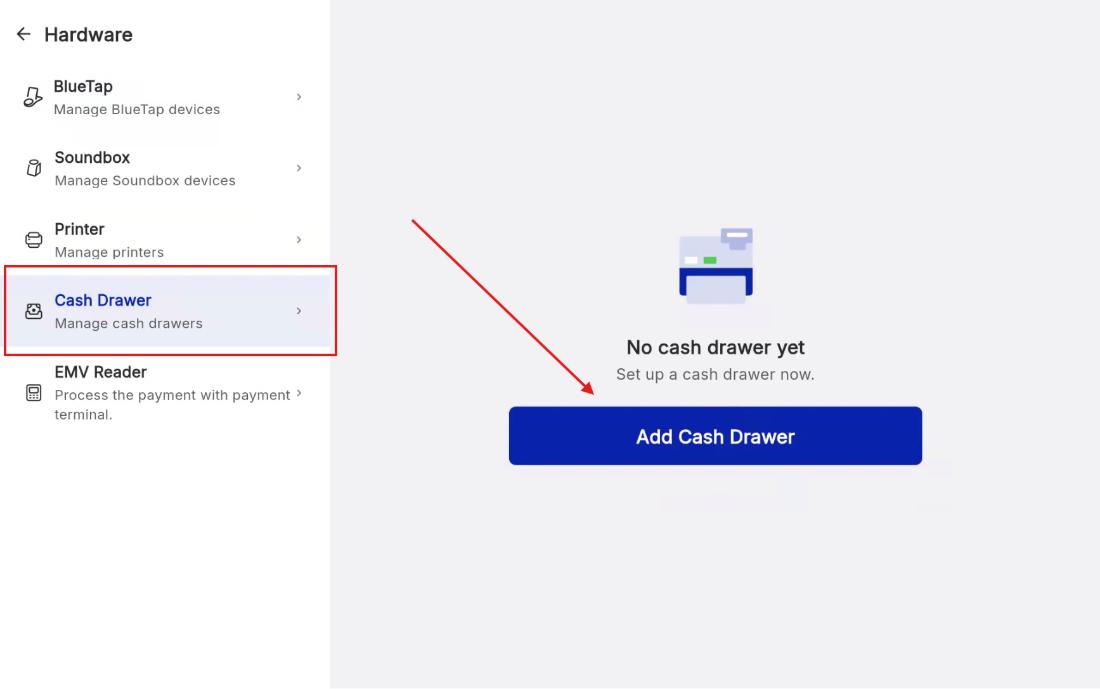
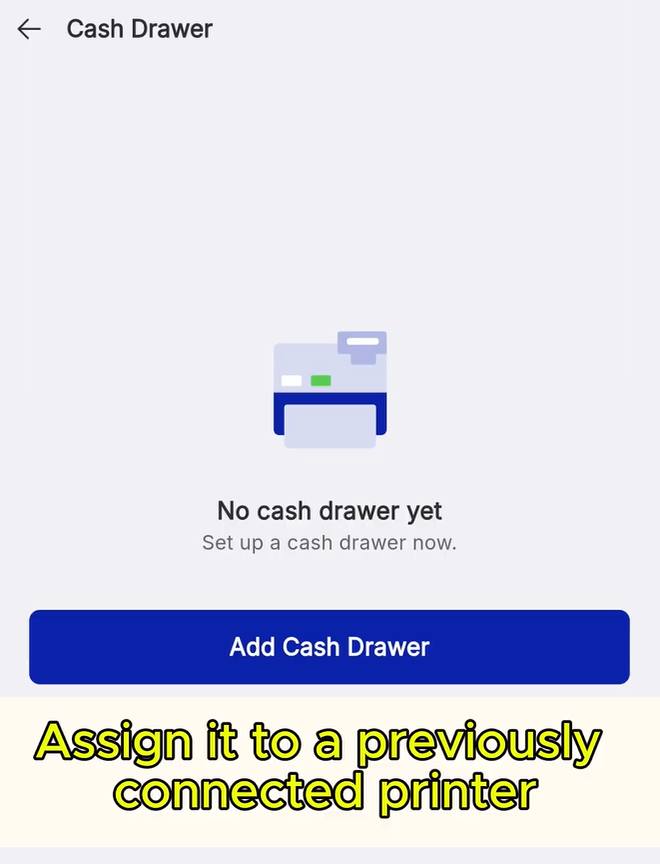
Back in Hardware, open Cash Drawer and tap Add Cash Drawer. Under Select Connection Method you get two choices — Printer or Hardware Port. Which one you use depends on the equipment in front of you; see below. Pick it, tap Connect, and once you see Connected successfully the drawer kicks open on every cash sale.

Plug the cable in first. The method you pick in the app must match where the drawer’s RJ11/RJ12 cable is physically plugged — into the printer, or into the POS itself.
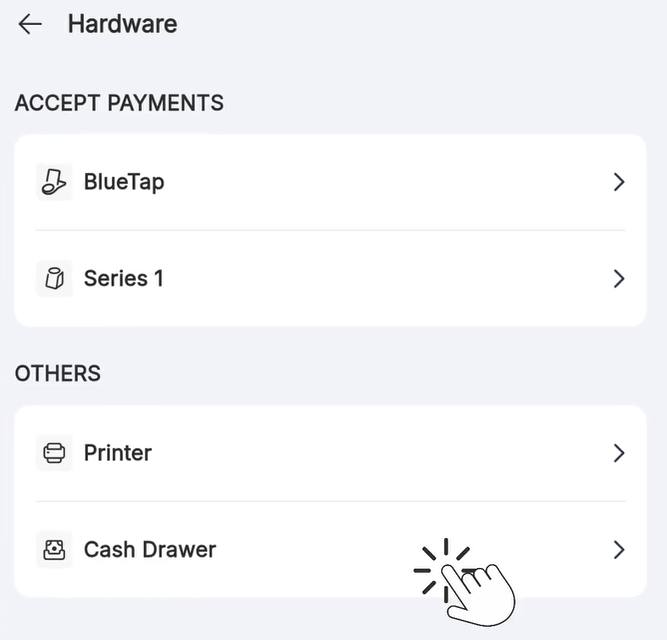
Open Cash Drawer.
Open Cash Drawer.
Add Cash Drawer.
Add Cash Drawer.
Pick the receipt printer.
Connected, plus the right cable.

Which connection method to use

Three situations, and the method each one calls for. Printer means the drawer cable runs into an external printer; Hardware Port means it runs straight into the POS.

OPTION 1

Cash drawer to Printer

Use when your POS has no RJ11/RJ12 socket

Your POS device has no RJ11/RJ12 plug, or you would simply rather not run a cable to it. Plug the drawer into the DK port on the back of your external receipt printer, then choose Printer in the app and pick that printer. Make it the printer that prints your Merchant and Customer copies, so the drawer kicks at the right moment.

OPTION 2

Cash drawer to Hardware Port

Use when your POS has a built-in printer

Your POS device has an internal printer, so there is no external printer to hang the drawer off. Plug the RJ11/RJ12 cable into the port on the back of the POS itself, then choose Hardware Port in the app.

Hardware Port, in the app.
The port on the back of the POS.
OPTION 3

Either one

Use when you have both

Your POS supports RJ11/RJ12 and you run an external printer. Both methods work, so it comes down to preference and how you want the cables to sit at the counter.

Does the drawer open on a cash sale?

Need help? Contact support

WHERE TO GO NEXT

NEXT

Wi-Fi & LAN printer

Read the guide →
NEXT

Build your store

Read the guide →

IF IT LOOKS WRONG

Check the cable is in the DK port of the printer you linked, and that this printer is the one printing Receipt copies.

A drawer linked to a kitchen printer only kicks when that printer fires. Link it to the receipt printer instead.

Nothing is paired yet. Either pair the Bluetooth printer first, or use Hardware Port if the drawer is cabled to the POS.


Still need help?

On-site set up and 1:1 training

Get a dedicated trainer to set up and address your needs on the spot.

View plans

Attend free online webinar

Pre-recorded set up demo that you can watch anytime at your own pace.

Sign up