Creating groups & modifiers
Updated: 9 Sep 2026
Groups bundle customisable options — add-ons, spice levels, sizes — that you attach to menu items, so staff capture every order variation with the right price at checkout.
WHO THIS IS FOR
Store managers and business owners
- configuring item customisations, add-ons, and modifier pricing.
Kitchen and operations leads
- organising order modifiers for clear kitchen-display tickets.
BEFORE YOU BEGIN
Quantity logic. Min and Max control how many options a customer can pick.
Optional or required. Set Min to 0 for optional add-ons, or 1 and above to force a choice.
Pricing. Every modifier needs a price, even free ones. Enter 0.00 for those.
THE STEPS
The screens are the same whether you are on a tablet or a phone.
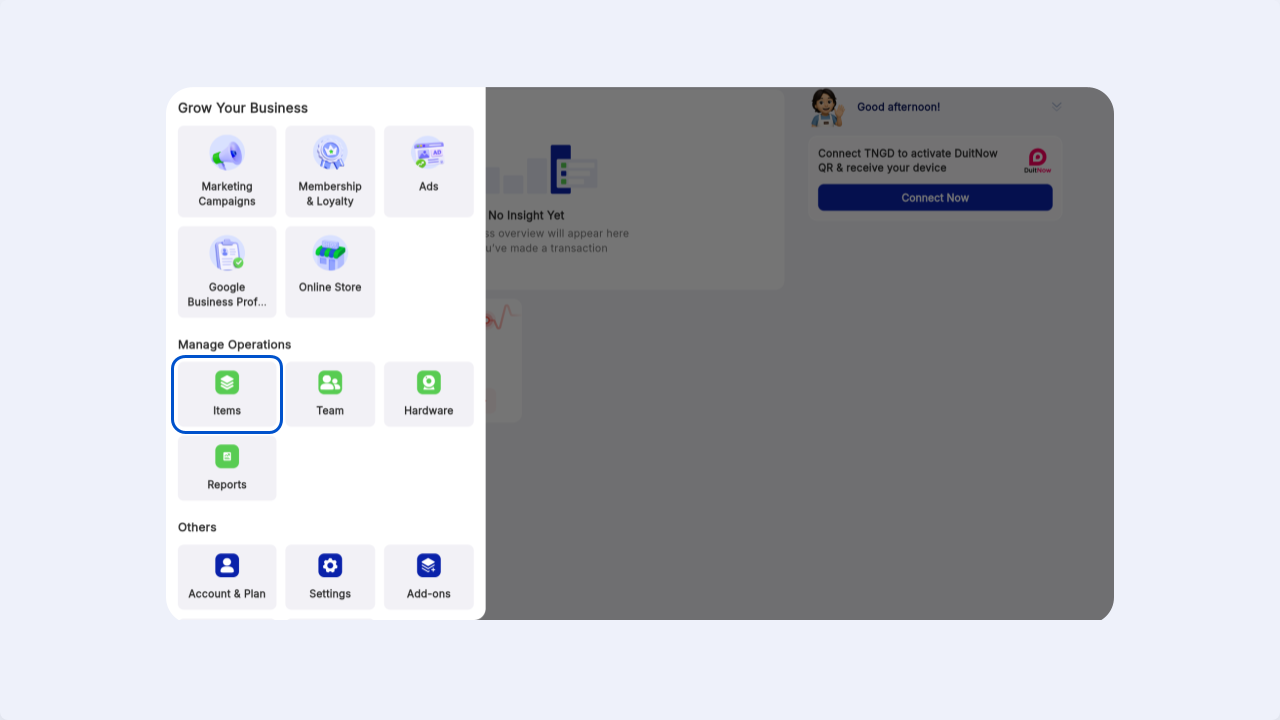
Step 1: Open the Group tab
From the dashboard, tap the More icon and open Items. On the Manage Items screen, switch from the Item tab to the Group tab.
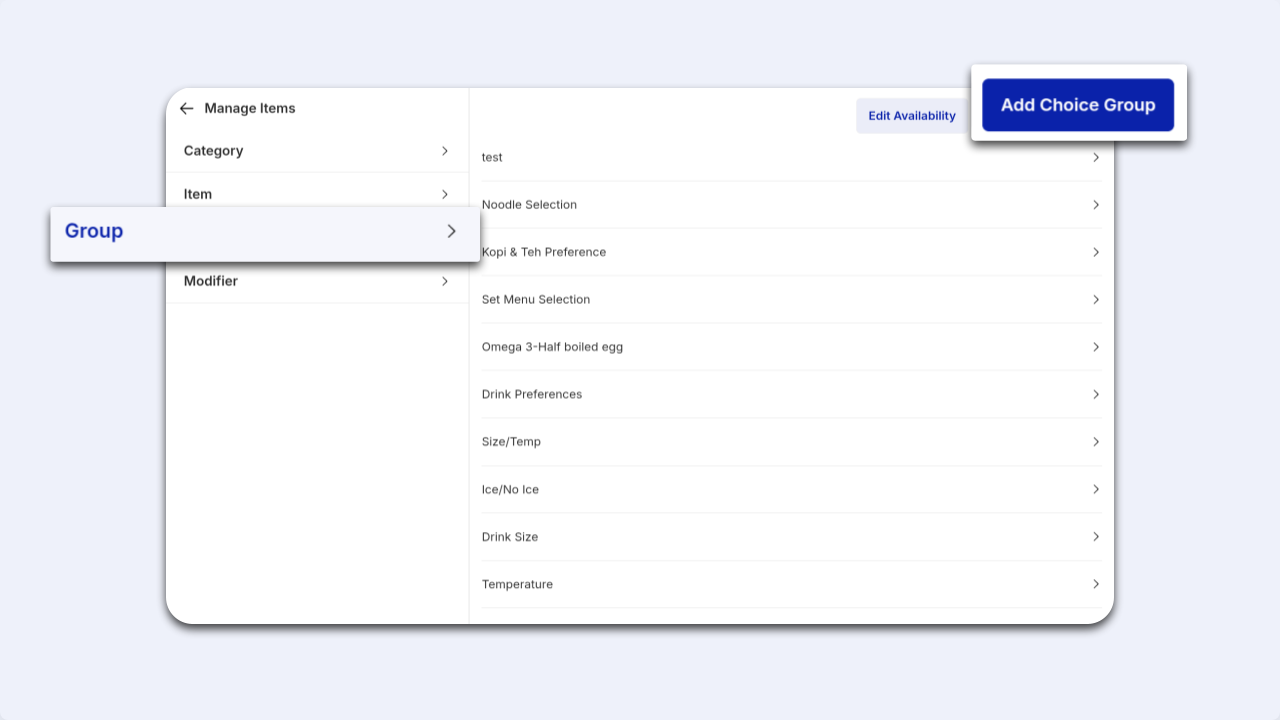
Step 2: Create a new Choice Group
Tap the blue Add Choice Group button, then type a descriptive name in Choice Group Name — for example Add on, Sauce Choice, or Spice Level.
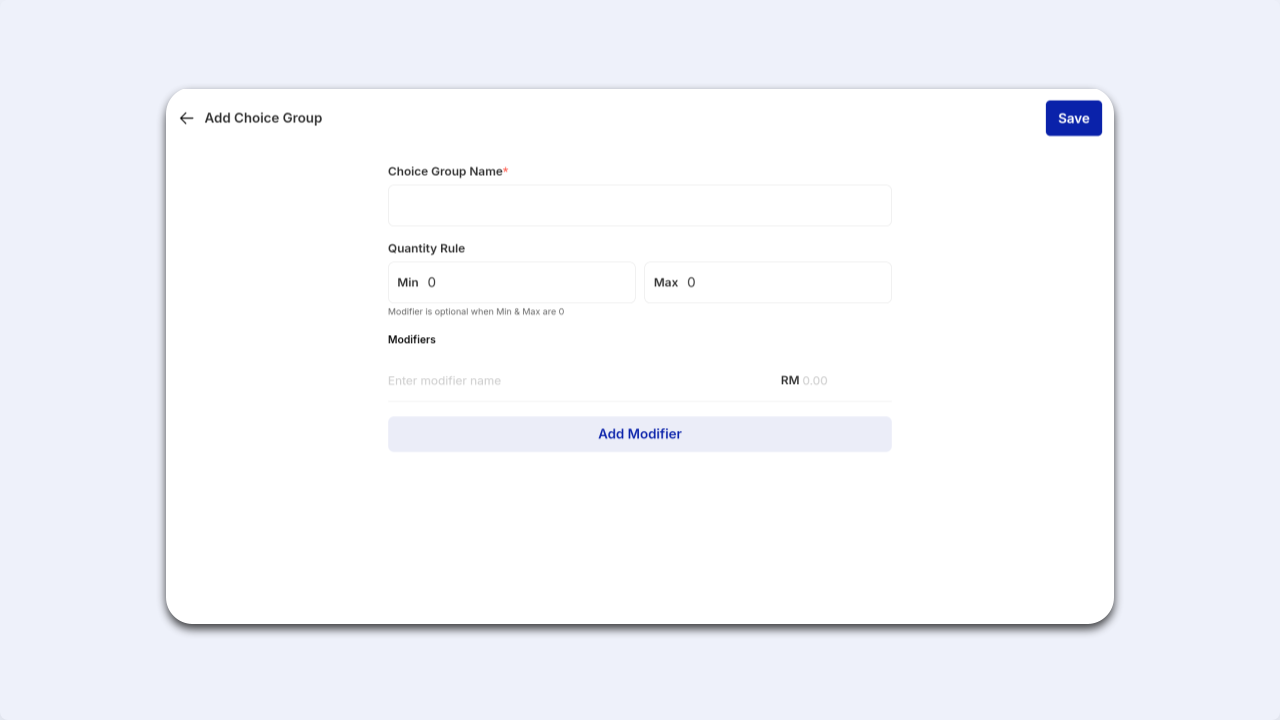
Step 3: Set the quantity rules
Under Quantity Rule, set Min and Max to control how many options a customer can pick.
In Modifiers, enter each option with its price, then tap Add Modifier to add more — for example Nasi RM1.00, Sambal Lebih RM0.50.
Every modifier needs a price. Fill in a price for every option, including free ones. Set those to 0.00.
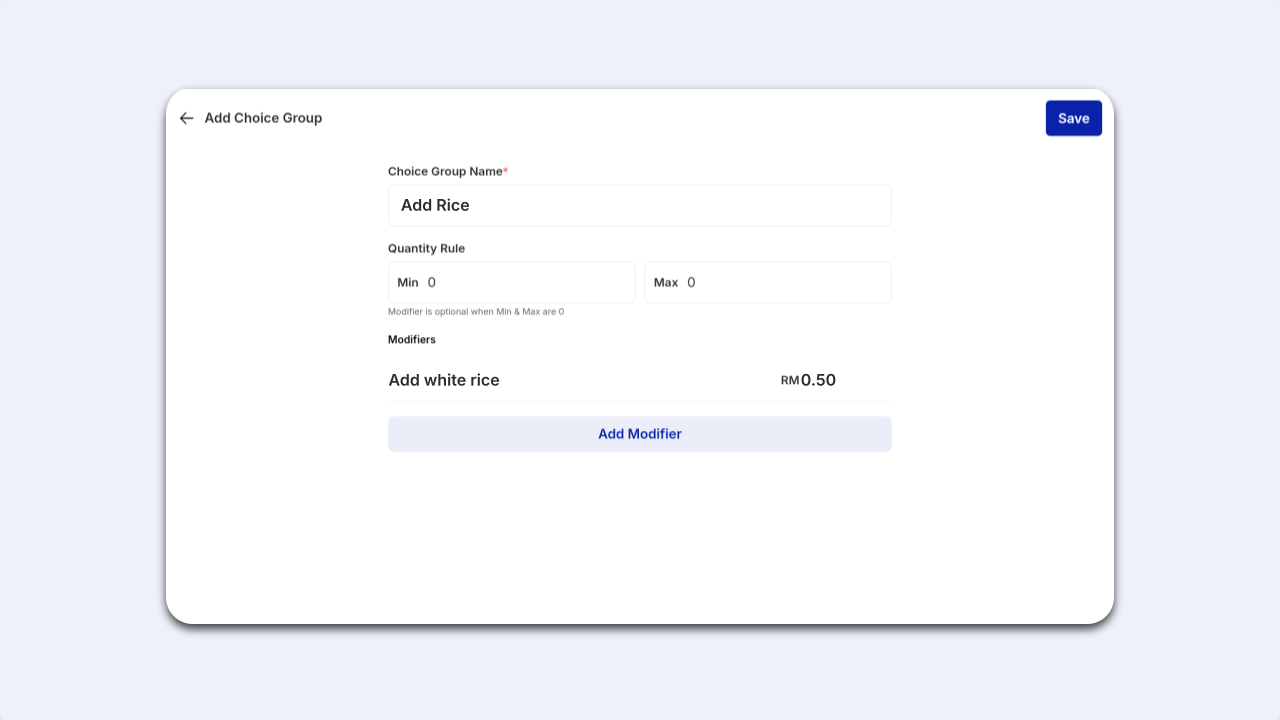
Step 4: Save the group
Review the option names and prices, then tap the blue Save button at the top right. A green Choice group created successfully message confirms it, and the group appears in your Group library, ready to attach to menu items.
IF IT LOOKS WRONG
Every modifier needs a price. Fill in 0.00 for the free ones, then tap Save again.
Min is set to 0, which makes the group optional. Set Min to 1 or more to force a selection.
Saving the group only adds it to your library. Open the item and attach the group to it before it shows in the order overlay.